Lab Configuration Tab
Select this tab to open a previously configured lab layout or to configure a new lab layout.
Create New Layout
Click Create New Layout to create a new lab layout.
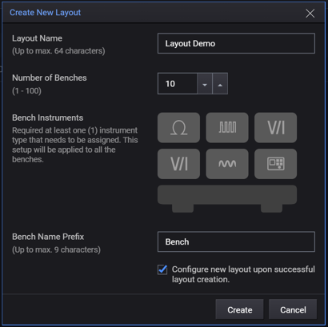
In the Create New Layout dialog box, enter the Layout Name, Number of Benches, Bench Instruments, Bench Name Prefix, and click Create. If the check box for Configure new layout upon successful layout creation is checked, you will be directed to the new layout configuration page after clicking Create. Else, you will return to the layout list page after clicking Create.
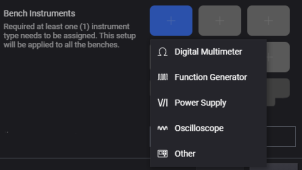
Click on  to add instruments. You can add up to a maximum of six instruments onto each bench. The instruments added will automatically appear in all of the other benches.
The new layout will appeared in the list of layouts in the Lab Configuration tab.

Import from CSV
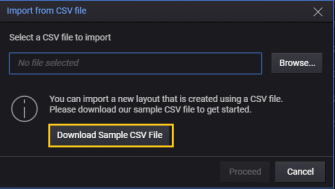
Click Import to import a lab layout from a CSV file (.csv).

In the displayed dialog box, click Browse to browse through the CSV file from your computer's file system, and click Proceed to load the lab layout into system. The imported layout name will be the same as the CSV file name.
![]()
Download Sample CSV File
You can import a layout that is created in CSV file into the Manager App. To download a sample CSV file, click Import and click Download Sample CSV File from the dialog box.
The downloaded CSV file is a sample of the template used to create layout in CSV file.
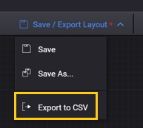
Export to CSV
Select a layout and click Export to export a lab layout into a CSV file.

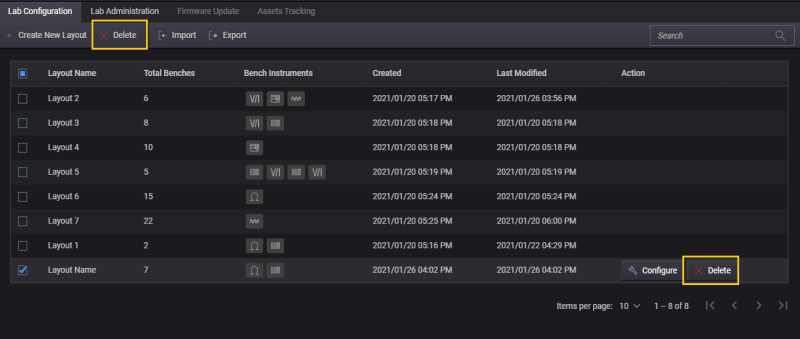
Delete Layout
Select a layout and click Delete at the top menu bar or hover your mouse over the layout and click the Delete icon when it appears. For multiple layouts deletion, select the layouts by clicking on the check boxes and click Delete at the top menu bar.
Sorting Layout
The layouts can be sorted according to the Layout Name, Total Benches, Created Date and so on. Hover your mouse to the headings until the sorting icon  appeared. Click the icon to sort the list accordingly.
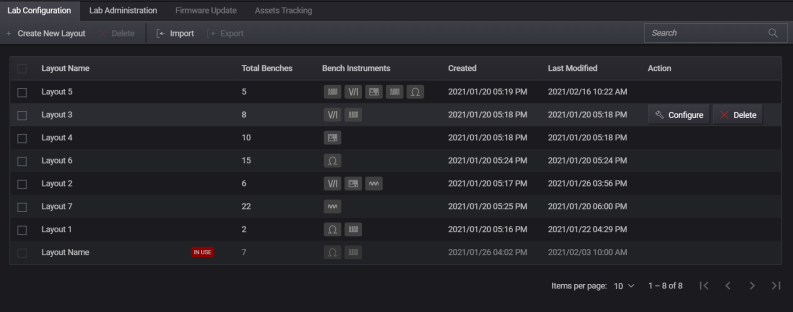
In Use Feature
Switching to the Lab Configuration tab without closing the opened layout in the Lab Administration tab will show the ![]() icon appearing beside the currently opened layout in the Lab Configuration tab view. This indicates that the layout is currently in use in the Lab Administration tab and no configuration can be done in the layout.
icon appearing beside the currently opened layout in the Lab Configuration tab view. This indicates that the layout is currently in use in the Lab Administration tab and no configuration can be done in the layout.
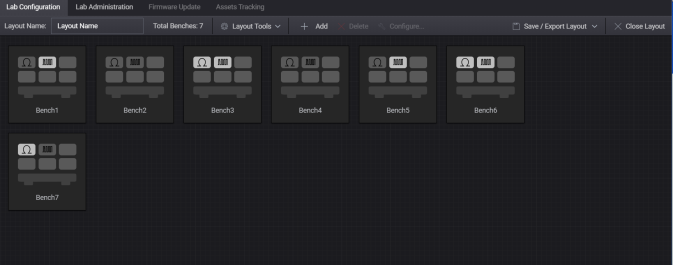
Lab Layout Configuration
To configure the lab layout, hover the mouse over the layout and click Configure when it appeared.
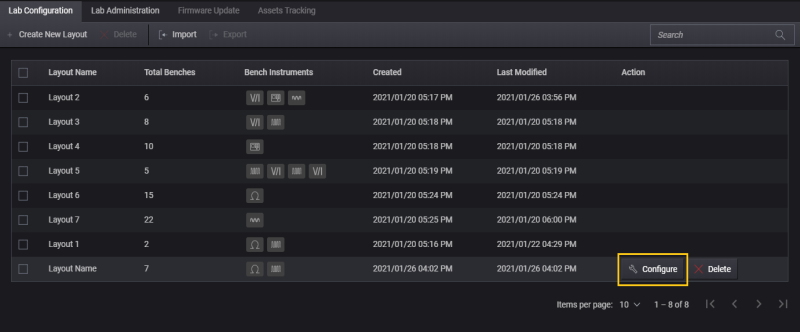
In the overview of the selected layout, you can configure instruments, add or delete benches, change the layout name or the benches names and so on.
Instrument Configuration
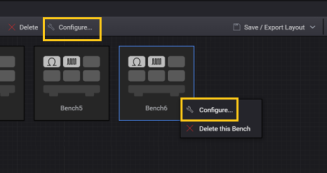
In the selected layout, right-click on the selected bench and click Configure. Alternatively, you can select any benches and click the Configure button located at the top menu bar.
In the Configure Instrument Details dialog box:
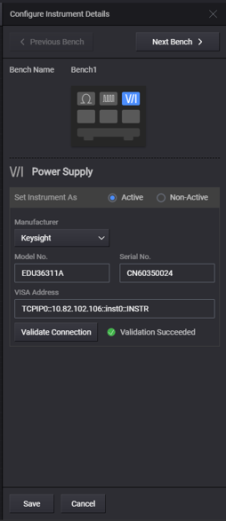
- Select the instrument to be configured, the instrument will be highlighted when selected.
- Determine the status of instrument to be Active or Non-Active. Instruments that are set to Non-Active will be disabled for all process such as configuration, check connection and send state file.
- Identify the instrument's manufacturer as Keysight or Other.
- Configure the instrument with the respective Model No. and Serial No. or VISA Address. Note that the Model No. and Serial No. must be unique within the layout. Click Validate Connection to validate the connection.
- Continue to configure the next instrument by selecting the instrument on the bench.
- When the configuration is done, click Save to complete the configuration.
- Click Next Bench or Previous Bench to go to the prefer bench for configuration.
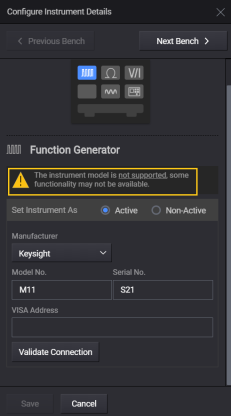
If an instrument is not supported, a message will appear to indicate it is unsupported during configuration.
If an instrument is checked out in the Asset Tracking, a message will also appear to indicate the check out status of the instrument.

The same check out message will appear in the instrument's tooltip in the layout view.
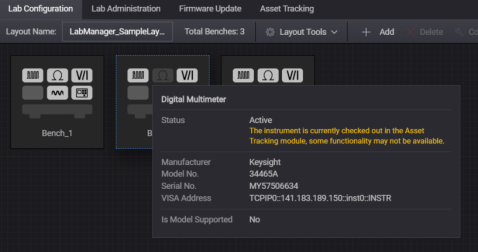
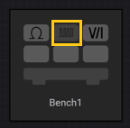
Instruments that are configured will be shown with a lighter color background.
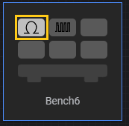
Instruments that are checked out or non-active will be shown in a darker color background.
Add New Bench
To add a new bench in a layout, click Add in the top menu bar.

In the Add New Bench dialog box, enter the new bench name and click Add. The new bench will be added in the layout.
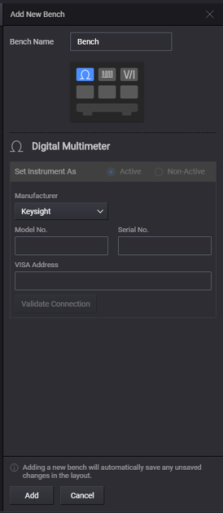
You can configure the instruments with the respective instrument's Manufacturer, Model No. and Serial No. or VISA Address before adding in the new bench. This way, the instruments in the new bench will be configured when added into the layout.
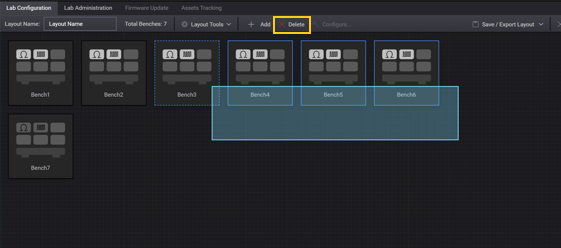
Delete Bench
To delete a bench, right-click on a bench and click Delete this Bench or select the bench and click the Delete button at the top menu bar.
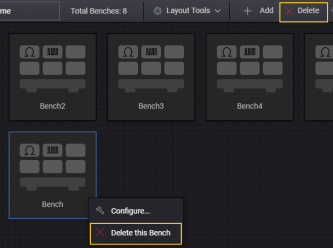
To delete multiple benches, drag-select the benches and click Delete.
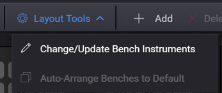
Layout Tools Menu
Change/Update Bench Instruments
To change or update the types of instruments on the bench, click Layout Tools, and click Change/Update Bench Instruments.
In the Change/Update Bench Instruments dialog box:
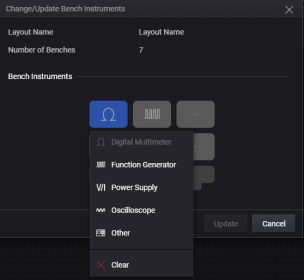
- Click on an instrument and replace it with another instrument.
- Click on '+' to add new instrument onto the bench.
- Click Clear to remove an instrument.
- Once done, click Update to complete the changes. The changes will apply to all the benches in the layout.
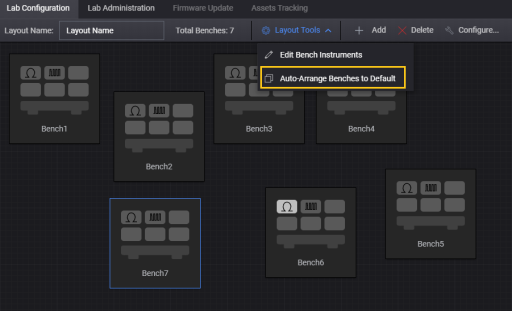
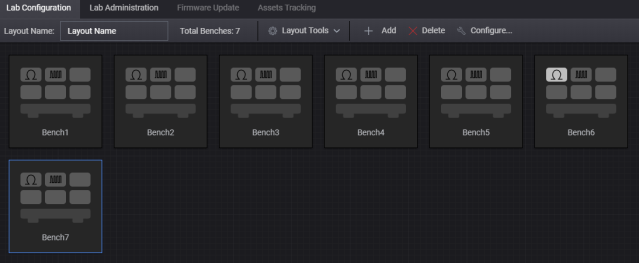
Auto-Arrange Benches
The benches can be move to any position or arrangement in the layout. Hence, click the Auto-Arrange Benches to Default to automatically re-arrange the benches to the default arrangement.
Save/Export Layout Menu
In addition to changing the position or arrangements of the benches, the Layout Name and the Bench Name of each benches can be rename or change in this view.

A red asterisk mark will appear beside the Save/Export Layout when there are changes in the layout which indicates that there are new changes that have not been saved.
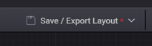
Once the changes are made, click Save/Export Layout and click Save to save the current layout with the new changes or Save As to save the current layout under a different name.

Click Export to CSV to export the layout to a CSV file.
Close Layout
Click Close Layout to exit the layout.
